
Smokey Eye for Beginners: A Step-by-Step Look That Doesn’t Turn Muddy
The first time most people try a smokey eye, it feels a little like cooking without a recipe. You start with good intentions, add a darker shade because it looks pretty in the eyeshadow palette, blend like everyone says you should, and then somewhere between the outer corner and the entire lid it all turns the same grayish-brown. Not dramatic. Not soft. Just… muddy.
If that sounds familiar, you’re in good company. A smokey eye is one of the most requested eye makeup looks and one of the easiest to misjudge, especially for beginners. The good news is that a beautiful smokey eye is less about talent and more about restraint, right tools, and understanding how depth actually works on different eye shapes.
What a Smokey Eye Really Is (and Why It Often Goes Wrong)
A true smokey eye was never meant to be heavy darkness across the entire lid. At its core, the smokey eye look is about soft depth shadow that fades gently from the lash line upward, like smoke drifting rather than sitting still.
Muddy blending usually happens when tones blend without intention. Too many similar shades, especially when they’re all medium-to-dark, melt together into one flat color. Add in mismatched undertones or overly creamy product, and the perfect smokey eye look starts to blur in the wrong way.
You’ll often find that editorial smokey eyes those dramatic, inky looks use techniques that don’t translate well to everyday eye makeup. Beginners do better with fewer shades, lighter pressure, and textures that forgive small mistakes. Undertone, eye shape, and product texture matter more than the total number of colors you use.
Prepping the Eye Area: The Step Most Beginners Skip
Clean, hydrated eyelids are quiet heroes in a smokey eye for beginners. When the skin is dry or overly slick, eyeshadow grabs unevenly or creases before you’ve even finished your mascara.
A small amount of eye cream can help comfort the area, especially if your lids feel tight, but less is more. Let it absorb fully. Too much skincare breaks down eyeshadow wear and causes slipping, especially near the lash line.
Eye primer works best when you want longevity and true color payoff. Concealer can work in a pinch, though it often needs a light set with translucent powder so blending stays smooth. Think of this step as preparing a canvas not painting it yet.
Choosing the Right Shades for a Clean Smokey Effect
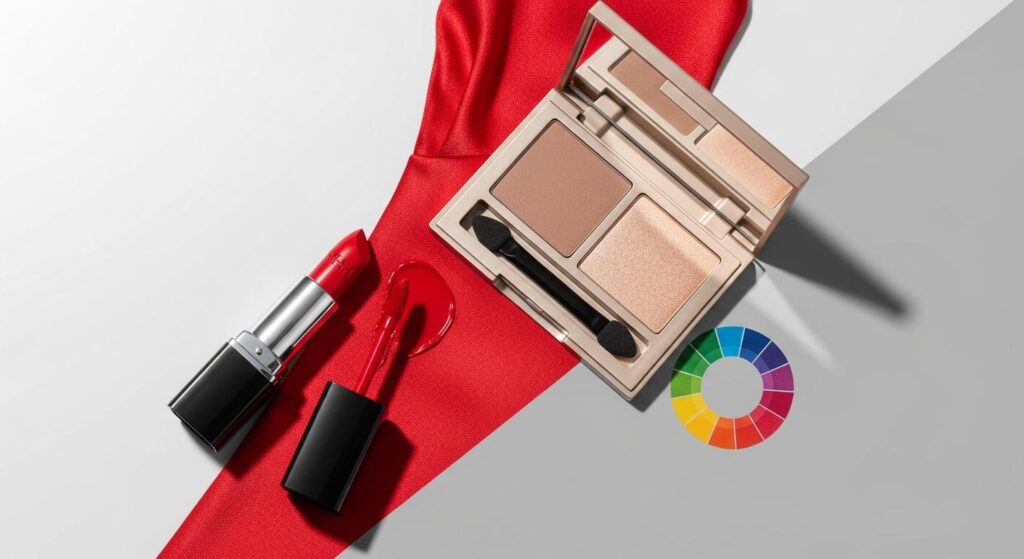
One of the most common smokey eye myths is that black eyeshadow is required. In most cases, starting with mid-tone neutrals like taupe, soft brown, or muted charcoal gives you far more control.
Matte eyeshadow blends more predictably, while satin finishes add softness and reflect light in a forgiving way. Shimmer all over the entire lid can exaggerate texture and blur shape, especially on hooded eyes.
A simple formula works best: one anchor shade for the crease and one darker shade for depth. The darkest shade should stay close to the outer corner and lash line. Matching tones to your skin tone and eye color helps, too warm browns flatter brown eyes beautifully, while cooler grays often suit blue or green eyes.
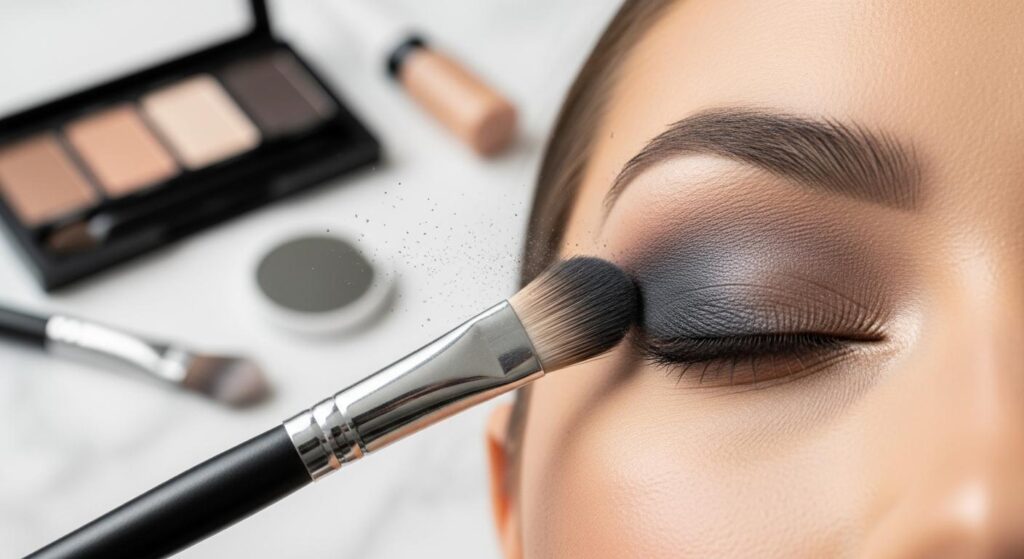
Tools That Make or Break a Beginner Smokey Eye
If there’s one brush that earns its keep, it’s a fluffy brush. A clean blending brush does most of the work, diffusing edges without depositing too much color at once.
A smaller brush, slightly denser, helps place a dark shade with intention. Brush density changes color payoff; the firmer the brush, the deeper the deposit.
Clean tools matter more than people realize. Residual pigment from yesterday’s eye makeup can muddy today’s look before you even notice. A quick wash or spot-clean keeps blending predictable.
Step-by-Step Placement That Prevents Muddy Blending
Before touching the darkest shade, map the crease with your lighter shade. This creates a seamless transition and acts as a guide for where depth should stop.
Build color slowly. A light hand beats heavy coats every time. Add, blend, pause. Then decide if you actually need more.
Keep the darkest shade close to the lash line and outer corner, using a small brush. This creates structure without overtaking the entire lid. Blend upward gently, not endlessly. Knowing when to stop blending preserves the natural shape of almond eyes, hooded eyes, and other different eye shapes.
Balancing the Look: Liner, Lashes, and Brows
Liner should support the eyeshadow, not compete with it. Brown or charcoal eyeliner often feels softer than black and blends into the lash line more naturally.
Smudging liner lightly into the upper and lower lash line adds depth without harsh edges. The lower lash line should echo the top, not overpower it.
Mascara adds lift and definition. False lashes are optional, though lighter styles tend to complement a smokey look better than very dense ones. Groomed brows frame everything, keeping the eye makeup intentional rather than heavy.
Common Smokey Eye Myths That Trip Beginners Up
Darker is not always better. In fact, too much dark shade too soon is the fastest route to a muddy result.
More shades don’t guarantee a better outcome. Many perfect smokey eye looks rely on two or three colors used well. Another misconception is that smokey eyes are only for night. With softer tones and lighter application, they work beautifully during the day.
Trends come and go, but eye shape matters more. Adjusting placement for your natural structure makes every technique easier.
Making the Smokey Eye Feel Wearable and Skin-Friendly
A smokey eye feels more wearable when the rest of the base makeup stays soft. Heavy contour or overly matte skin can tip the balance too far.
Comfortable formulas matter. When eyeshadow feels light and flexible, you’re less likely to overwork it. Confidence shows in subtle ways.
With practice, the smokey eye becomes less of a special-occasion skill and more of a reliable option. A beautiful smokey eye doesn’t shout. It hums quietly, adding depth and polish, and it almost never looks muddy when you respect the steps.
And if it does go sideways once in a while? That’s part of learning. Even experienced makeup artists still wipe and restart. The difference is knowing why and now, you do.